How to pose like a professional model
Published 21 March 2026
The biggest misconception about posing is that it is about finding a single good position and holding it.
Professional models do not think that way. They think about movement, angles, and responding to direction. They understand enough about how their body reads on camera to make small adjustments instinctively.
This guide covers the fundamentals.
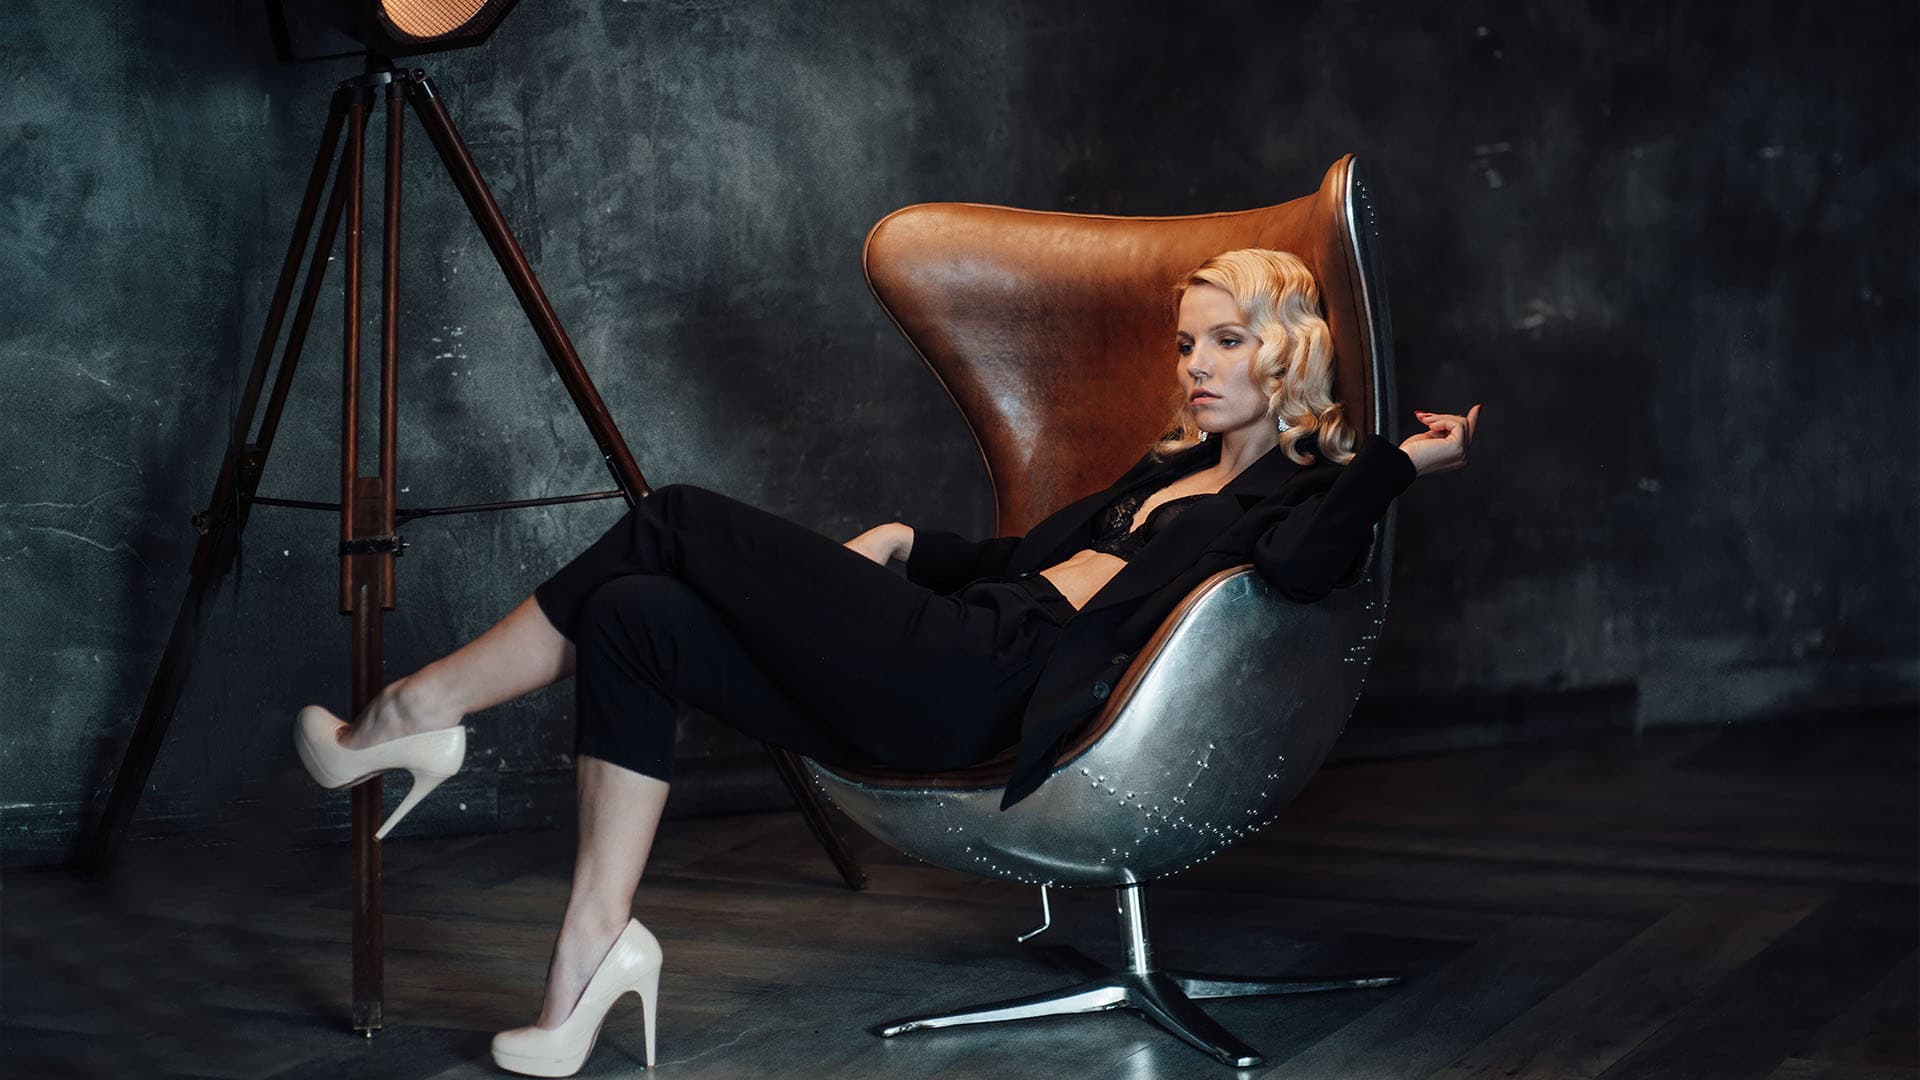
Posing starts with your body, not your face
Beginners focus on their face. Professionals focus on their whole body, specifically on how their weight and positioning create lines that read well in a flat image.
A few principles:
Never stand square to the camera. A body facing directly forward looks wider and flatter than one angled at 45 degrees. Turn your hips 45 degrees to camera while keeping your shoulders more forward and you create a more dynamic, flattering line.
Create space between your arms and your body. Arms hanging flat at your sides merge with your torso in a photograph. A hand on a hip, an arm extended slightly, an elbow bent: these create definition and make your silhouette more interesting.
Think about your weight placement. Shift your weight onto one hip and the whole line of your body changes. Your hip pops on the weight-bearing side, your opposite shoulder drops slightly, and the result is a relaxed, elongated posture. Standing with your weight distributed evenly on both feet reads as rigid.
Working with your hands
Hands are the thing beginners worry about least and professionals think about most.
Limp, dangling hands are distracting in photographs. Clenched hands look tense. The goal is positions that look relaxed and deliberate without drawing too much attention.
Useful positions to practise:
- Fingertips lightly on a hip or waistband, hand relaxed
- Hand running loosely through or near hair
- Fingers lightly touching a collar, neckline, or face, without pressing
- Arms crossed or overlapping at the wrist, tidy but not rigid
Avoid: full flat palms on hips (too rigid), fingers spread wide (looks tense), and forgetting about your hands entirely (they show up in the frame).
Angles and the camera
You cannot see what the camera sees. One of the most useful things you can do early in your career is study your own photographs: notice which angles are working and which are not, and understand why.
Chin forward and slightly down. This prevents the double-chin effect created by looking up at the camera and it lengthens the line of the neck. Chin down alone is wrong: chin down without extending it forward creates a compressed neck. The motion is chin out and then down.
Eye line. Looking directly into the lens is direct and confrontational, in a good way. Looking slightly past the camera is more editorial. Looking down creates a reflective, internal quality. Know what the shot calls for and find that look consciously.
Your best side. Almost everyone has one. It is usually the side with the more defined jaw or the eye that opens slightly more naturally. Know which side that is. You will not always be able to favour it, but when you can, you should.
Working with a photographer
The best posing happens when model and photographer are collaborating.
Listen to direction carefully. When a photographer says turn a little to your left or give me something softer, they are responding to what they are seeing in the viewfinder: information you do not have. Trust that direction, even when it feels counterintuitive.
Ask for feedback if you are not getting direction. A simple how does this look from there opens the conversation and usually gets you a useful adjustment.
Move between shots. Static posing produces static images. Between each frame, return to a neutral position and come into the next pose fresh. This keeps your posing from locking up and gives the photographer more to work with across a series.
Practise deliberately
Posing improves with deliberate practice, not just with more shooting.
Use a mirror. Full-length mirrors show you what poses actually look like rather than what they feel like. What feels dramatically different often looks subtly different. What feels slightly adjusted often reads as completely different in an image.
Study photographs you admire. When you see a photograph where the posing works particularly well, look at specifically what is happening: where the weight is, how the arms are positioned, what the face is doing, what the eye line is. This is faster than any amount of abstract advice.
Record yourself on video. Video shows your natural movement and what happens in the transitions between poses: information a mirror cannot give you. Watch it critically, not harshly.
Posing is a craft. It develops. Give it time.